If you’re brand new to online video, you’re probably in the market for a video editing software. While I use Adobe Premiere Pro, I’ve heard a lot about Adobe Rush, also in that same family. So if you’re curious about if Adobe Rush might be for you as a beginner, check out this video.
Video Editing App for Beginners: Adobe Rush for phone AND PC
If you’re in the market for video editing software, like a lot of my students and a lot of my clients, you probably are asking where should you start?
I use Adobe Premiere, but I’ve heard about this new product called Adobe Rush that may be better for
beginners. I got to speak with Danielle from Adobe while we were at VidCon. She will help all you beginners understand what is the difference between, Adobe Rush and Adobe Premier. Also, she will help you identify what’s a better product for you if you are brand new to video.
Meet Danielle
Danielle works on Premiere Rush. She’s a Product Manager. Here is what she has to say about Premiere Rush:
We introduced Premiere Rush to help aspiring creators; people who are getting started with video. The aim is to give them a tool that’s made for them to make video creation easy and fast. Premiere Rush is all about leveraging a lot of the existing technology that we have like some professional tools compare Pro and After Effects by putting it into a lighter weight experience. And an experience that you can use on the mobile device.
If you’re working on your phone or on your tablet, you can continue editing on the go. The project can go between a laptop or a computer and a phone?
Premiere Rush works on phones, tablets, and on your computer. It’s supported on IOS Mac, Windows, and Android. That’s really helpful.
Who is Adobe Premiere Rush for?
Adobe Spark
Anybody who’s getting started with video, Premiere Rush is a good tool for them We also have other tools within our video platform. There’s Adobe Spark video for anyone who’s working on the go or who wants to create something in seconds. There’s an awesome workflow within Adobe Spark to help you get started.
You can use some templates that are beautifully designed. Just throw your videos at it and it’ll automatically create something beautiful for you. It’s a great tool if you’re really just getting started and you don’t want to spend a lot of time.
Premiere Rush
If you want a little bit more creative flexibility, you may want to move up to something like Premiere Rush. There you have four video tracks available so you can stack things on top of each other, like cutaway shots or picturing in picture shots, titles, do color correction, work with your audio if your recording a voiceover or want to do things like auto dub against music.
Premiere Pro
But if you want to move up to the tool that has a lot of creative control and ultimate flexibility, Premiere Pro is going to be the tool for you.
Spark is more like an automatic thing and just a quick fix.
Rush gives you more room. So that might be better for someone who has some time and they want to give a little finesse.
Premiere Pro is going to be for the Pro level. For someone to really get a nuanced control.
Can you upgrade your video from Premiere Rush to Premiere Pro?
Anything created in Premiere Rush can be taken natively into Premiere Pro. In the Premiere Pro home screen when you launch a product, you’ll see a button that says Open Rush Project. You can start and edit on your phone if you are a Premiere Pro user. That is if you want to start incorporating mobile into your
workflow, you can shoot a bunch of footage right into a Rush project to make a rough edit. Then make some quick edits. And then because you’re an experienced Premiere Pro user, you can use Premiere Pro for your final edit.
We are seeing a lot of interest for existing from existing Premiere Pro users. They now have a tool that they can use, that works with the tool that they already use and start incorporating mobile into their workflow. A lot of existing and established creators, even if you’re advanced or an expert, you’re capturing footage on your phone.
Ready to Rush?
If you are starting out then Rush is probably then a good place to start. I get a lot of entrepreneurs, a lot of business owners, if they have some inkling that they may be ready to upgrade one day to Premiere, perhaps rush is the way to go.
It shows you how the video editing process works. It still has a timeline. You still work in a timeline to do your edit, got a color correction, and transitioning audio. You get a flavor of what you can do in a lighter weight experience.
Adobe Rush Video Editor Full Demo
Did you know that you can edit on your phone and across computers and multiple platforms using Adobe Rush the video editing software?
We’re are going to do a quick demo of Adobe Rush, something you can use on your computer and move your project across over to your phone. Or you can start on your phone and move around vice versa.
When you launch Rush on your phone you have access to all of your projects. You have access to projects that you started on this device or on your computer. Everything is synced to Creative Cloud, so you can pick up wherever you left off. Start here and move over to your computer and vice versa.
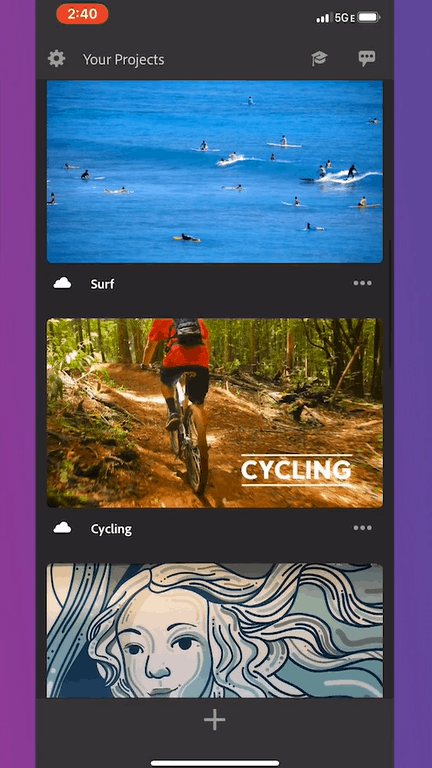
To start a new project on your phone you have two options:
1. You can either choose media that you’ve already captured and is on your device or in the cloud somewhere.
2. Or you can go right into a capture experience and capture right into a new project.
One cool thing about Adobe Rush is that you can capture media and you can also have control over your capture experience. So if you wanted to set your exposure or lock your exposure to change your temperature or anything like that you can do that manually. If it’s a little cool-looking in here you can warm it up.
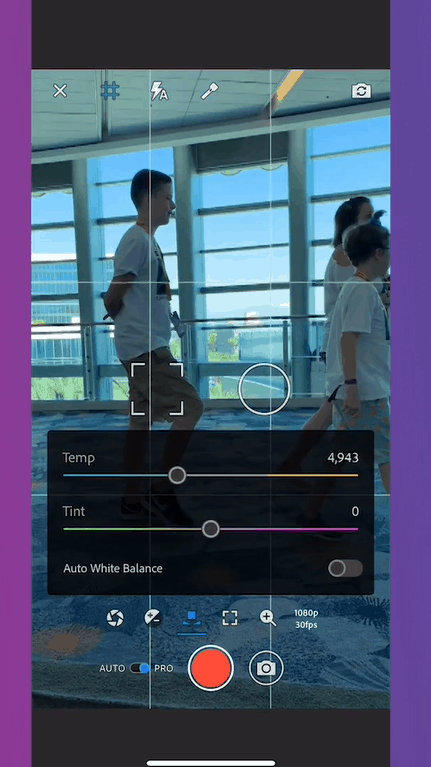
You can also change your resolution and frame rate. If you want to shoot in 4K you can do that right here from within this capture experience.
Any videos that you capture in this capture experience get queued up to go right into a project and once you do that it’ll line it up into the timeline. All your clips are laid out in the timeline. You can scrub and preview them. And then start making edits.
Sample Media within Rush
When you first launch the application as a new user, you’re taken through about a three-minute interactive guided tour, to walk you through all of the steps of how to create a video from end to end within Rush.
We use the sample media that ships within the application for this tour. I’m going to show you that in your media you select the clips in the order you want it in your timeline. You’ll see you get a preview of your timeline.
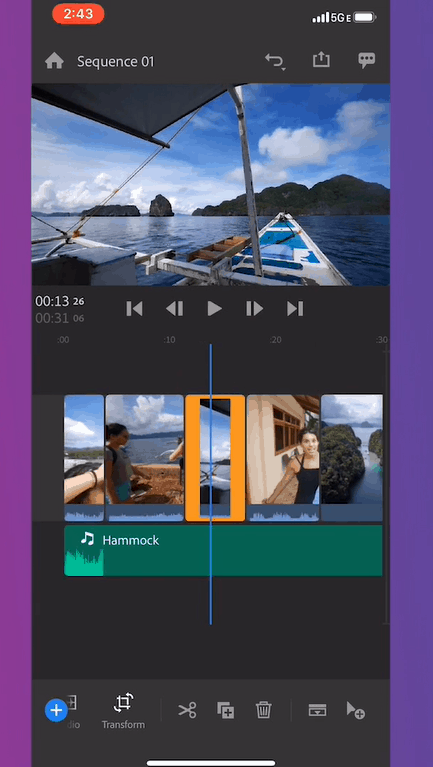
You can add videos, photos, and music tracks, all within this experience. They ship ten royalty-free soundtracks with the applications. You can add my music to play underneath my videos here as well.
You can then name your video. Once you hit create it’s gonna take all of the media that you selected right into a timeline. You’ve got your video clips. You can scrub through them. You’ve got your audio tracks playing underneath it.
Let’s start looking at some of the editing features within Rush. If you see the audio track is a little long, you can use a scissors tool to split that clip right where you want to cut it off. Take that last piece and just delete it.
Scissors tool to split clips in half.
You can rearrange the clips within the timeline. So if you wanted to pick a clip up, just drag it right over, move it along the timeline.
You can take a handle and trim it backward or forward to shorten or lengthen the clips. If you want to make this quick Instagram story of 15 seconds, you could use those trimming handles to shorten the duration of your overall video.
Create Cutaway Shots
You can create cutaway shots – cutaway shots are pretty popular with video editing. You basically see a shot and you cut away to a different shot.
Picture in Picture Shots
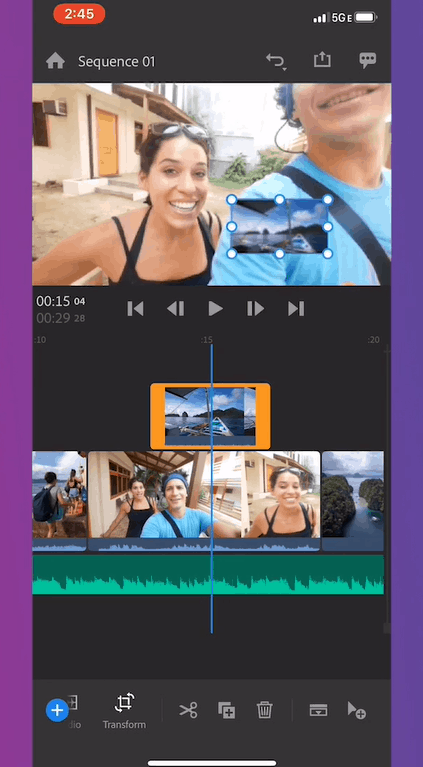
You can create a picture-in-picture shot. These are very common with journalism or news where you’re having a talking head and you want to get a picture-in-picture shot. Or you can use them for reaction videos of course. These secondary video tracks can be used for other things beyond just video clips or photos.
Add Titles
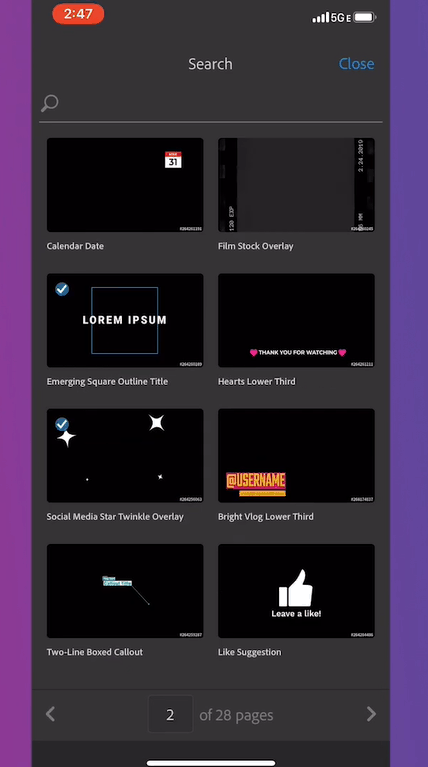
You can also add titles to your videos. When you go to the plus button and add a title it’s going to add a default title but it also opens up this menu to show you a bunch of built-in titles that are shipping with the application. Adobe ships hundreds more free motion graphics templates in Adobe stock right from within this panel as well.
You can choose from these. You’ll see that these are already animated motion graphics templates created in Adobe’s professional tools like Premiere Pro. You don’t have to know anything about animation or graphic. You just drag these on and they are fully customizable. You can change them to make them fit your look and feel for your videos.
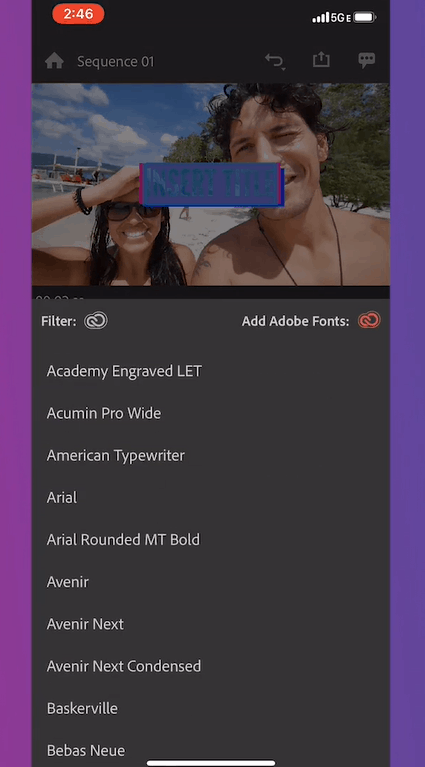
You have access to the layers. They’re fully customizable. You have access to the text layers and even have access to change the color of the shapes that are within these motion graphics templates.
Additionally, you change the fonts. You have access to Adobe fonts to fit your brand and aesthetic of the video.
You can change the font size, the character spacing, the line spacing, and the color too. There are tons of things that you can change here.
Apply Transitions
You can also apply transitions in between clips. If you want to add a cross dissolve in between your clips you’ll see that its fairly simple to do that. It’s a good way to show a lapse of time or show transitions. You can also do a dip to black at the beginning of your clip if you want it to fade in from black or fade in from white. It’s a really popular editing tool.
Lightroom User by any chance?
Similar to what you can do for your photos in Lightroom, you can also do to your videos within Rush. There’s a color panel dedicated to just adjusting all of your colors within the product. You’ve got built-in presets very similar to other apps you’ve used or Lightroom where you just tap on a preset and you can quickly give your video a look and feel.
But if the colors aren’t popping quite as much as you want them to, you also have all of the controls to manually edit something. If you want to make it a little bit warmer or make the colors pop a little bit more, you can really do that by adjusting the sliders.
You have a lot of control to give your look and feel to the video.
Audio Features
You can also record voiceover directly into the product. If the head of your mic is hooked up to your phone, you can record a voiceover, maybe talk about your VidCon experience while showing the video of your VidCon experience. All for the audio that you bring into the application, Adobe sense technology automatically detects what type of audio you’ve brought into the application.
If a someone is speaking, you’ll see that it’s automatically detected it as a voice clip. If you were to select on a music track, it’s automatically detected it as music. If it’s something that we can’t detect or if it’s ambient noise it’ll be selected as other.
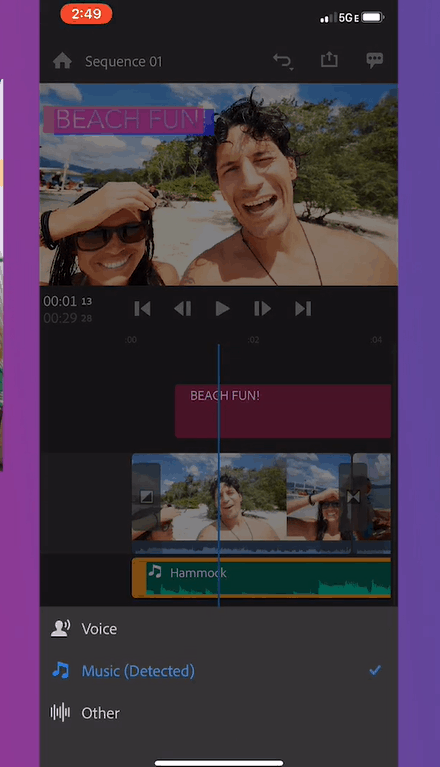
One common thing that we hear a lot from YouTube creators or content creators is about the conflict between music playing in the background in the narration right. It’s conflicting against each other. One way to correct that is by turning on the Autoduct. With one tap it’ll automatically deduct your soundtrack against any narration that’s happening in your timeline.
I’m gonna date myself here. I’ve been editing video for a long time and for many years I had to manually do all of that and it was very time-consuming. What a time we live in we’re now a mobile app can just do that
automatically.
Render the Video
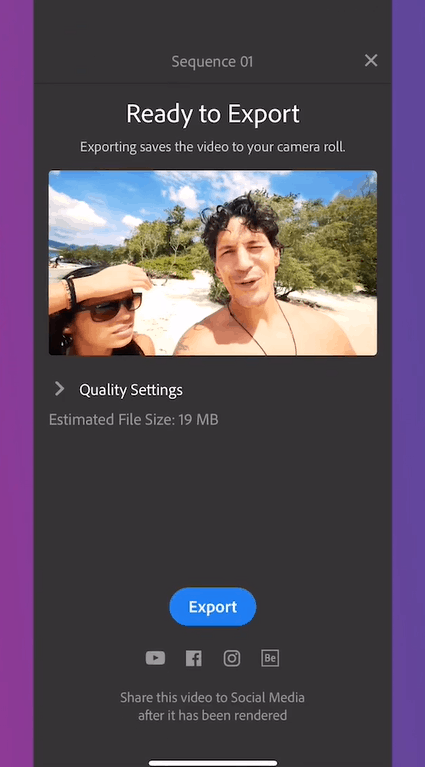
Let’s say we’re done and we’re happy with our video, you can, of course, export your video. It automatically gets saved to the device or to your camera roll. Once it’s done rendering you can have the option to share it directly to your social media channels.
Share Across All Channels
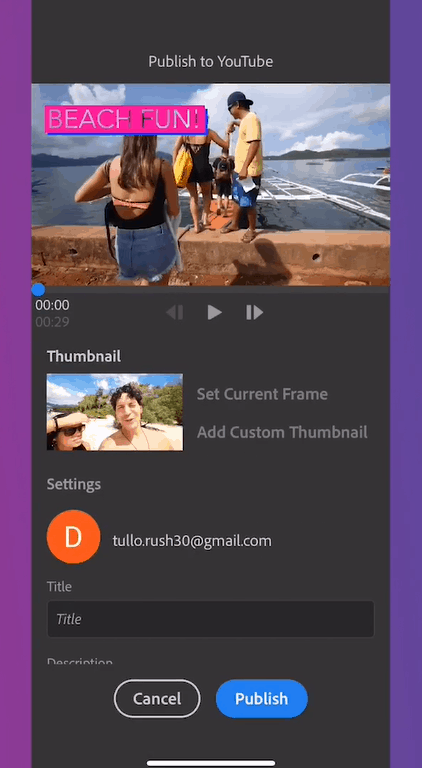
Another thing we hear from content creators is that they want to be able to save time and get their video out as quickly as possible to all of their channels. So right from within Rush you can share your video to YouTube. You can choose your thumbnail if you’re creating a thumbnail and like Adobe Spark post. You can add a custom thumbnail that you’ve created, you can also set a thumbnail from within the video itself.
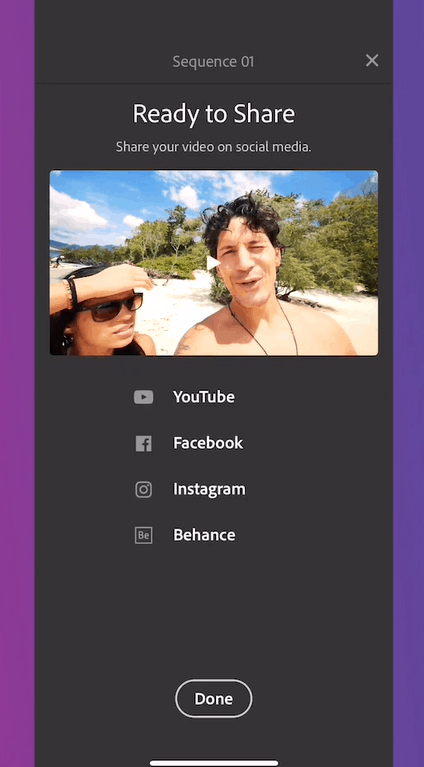
Once you’re signed into your YouTube account you have access to all of the things that you would normally
have access to you on YouTube, like your playlist, your channels and things like that. Moreover, you can customize and add all of your information right from within the tool and with one tap share it to YouTube.
There’s more
Make sure you check out Adobe Rush. I talk about a lot of other tools so make sure you check out my blog posts. There are other steps you can take. I would recommend you upload a YouTube video from Adobe Rush but put it as private. Then go to your computer and use the TubeBuddy tool to make optimize your video before you publish because that’s really important.
Check out my next blog post where I talk with TubeBuddy about how you get started using their plug-in as an additional tool to help you get more views on YouTube.

Michelle Osorio is a singer, filmmaker and content creator turned entrepreneur sharing her secrets to growth on social media and livestream.
